Handy & Useful Tips for House And Wall Painting
This topic deals with the tips and techniques of House and Wall Paintings. Below are the methods and techniques to be kept in mind while doing our painting project for our homes. These are very handy and easy to follow them and more practical.
This will give you a professional look finish for your home projects.
HERE THE TIPS AND TECHNIQUES FOR YOUR HOUSE PAINTS PROJECTS:
1-KEEP A WET EDGE AND ROLL THE FULL HEIGHT OF WALL:
Normally, when the painting is done laps marks and ugly stripes are caused by uneven layers of paint. It occurs when you roll over the paint over the area which is already dried up. It takes less than minute’s time to dry the paint. Never allow the roller dry reload it so often that it is half loaded. To maintain a wet edge start near a corner and run the roller up and down the full height of the wall moving over slightly over the each stroke.
MIX SEVERAL CANS OF PAINTS IN A LARGE BUCKET
Paint of one can may vary from the other; in order to get the consistency of color throughout the project paint should be mixed in large bucket or any other convenient container. Opening a new can of color in the middle of the color may be quite noticeable. So if your are mixing the color together in a large bucket this problem can be solved. It is always advisable to estimate the amount of paint you need in a bucket of 5 gallon and it is called ‘boxing’. If it is very difficult to estimate the coverage, better add more than less then required.
LET THE PAINT DRY AND CUT THE TAPE OFF: FOR A PERFECT EDGE
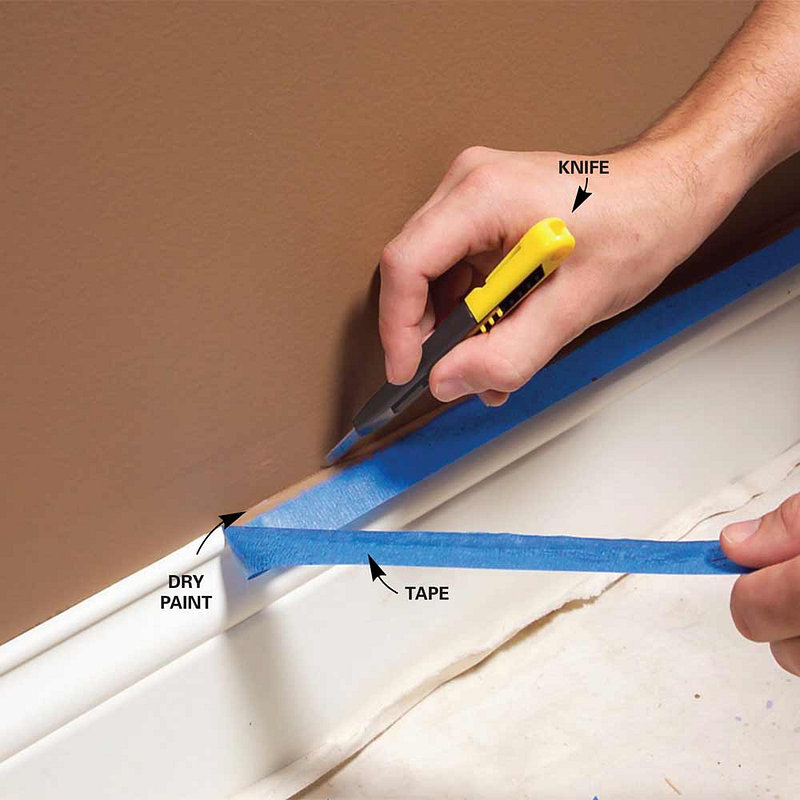
Once the paint dries up, tape can’t be pulled off the trim because the paint forms a film between wall and the tape. Before pulling the tape cut it loose. Removing the tape tears the pieces of dried paint off the wall.
For better and perfect result to your paint project, wait for the paint to dry at least 24 hours. After this you can use any sharp cutter or any knife to slice through the film. Start in area which is hard enough to slice cleanly. Cutting the paint while it is gummy you will make it a mess. As you cut the paint pull up the tape at a 45 degree angle.
4-PAINT THE TRIM FIRST, THEN CEILING AND WALL:
Professional painters usually follow certain order and rules when painting a room they paint the trim first and them they go for wall and ceilings. This is done because it is easier and faster to tape off the trim than to tape off the walls.
When painting the trim just concentrate on getting a smooth finish on the woods without bothering about the paints getting onto the walls. You will cover it while painting the walls later. Once the trimming is completely painted and dried up at least 24 hours then you can tape it off. Now you can go to the walls and ceilings and complete your project.
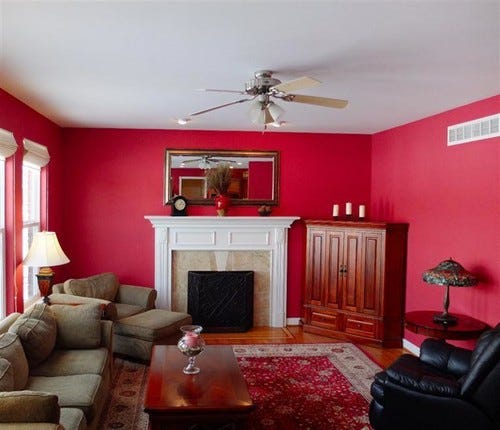
5- FRESHLY PAINTS WALL LOOKS BLOTCHY:
Usually this happens over the holes and cracks you patched with filler and drywall compound. The filler absorbs the ;paint and a result it leaves the surface dull. When the light hits this areas they stick out like a sore thumb. The solution to this problem is a a quick coat of premier that will eliminate the flashy look and removes the dullness. Premier seals the patch so paint wouldn’t sink in and look dull.
6-CLEAN DIRTY SURFACES BEFORE PAINTING:
Before you start your project of home painting, make sure that all the areas to be painted is cleaned properly. Because the paint will chip off and peel off very easily if it is done on the dirty surface. Surface should be cleaned with heavy duty cleaners meant for prepaint purpose. They are meant for greasy and oily surfaces like kitchens etc. Wipe on the cleaner in circular motion using lint free cloth. Start at the bottom and work up. After the surface is cleaned fill all the cracks and holes if any. Make sure you wear rubber gloves while working on it.
7- ROLL PAINT ALONG THE EDGES FOR CONSISTENT TEXTURE:
Corners and areas which are next to the trim are painted with brush have notice-ably different texture than the surroundings . In order to get finished texture as consistent it should be immediately rolled before the paint dry.
Use 3” roller with a nap that is of same thickness as the roller used for the rest of the walls.
8-USE THE COTTON CLOTH DROPS RATHER THAN PLASTIC
However careful you are spills and spatters happens while painting your home. All it take is a cotton drop cloth of apprx ( 4’ x 15 ). The main benefit of this cloth which is very thick stays in its place and you do not need to tape it off. It can be used for covering any surface be it wooden and marble or any tiles. Etc. Where as plastic drop cloth is slippery and does not stays in its place. Ladder can’t be set on plastic surface. Worse than that is if paint spills on the plastic it can stay wet and they can end up on your shoes. Large spills need to be wiped off immediately or else they will seep through. If you spatter paint on any surface wipe it off immediately.
9- FEATHER OUT PAINT WHERE YOU CNAT KEEP WET EDGE:
Large areas like ceilings, stairs and extra walls can’t be covered in a single stroke the best way is to minimize the lap marks on these areas by feathering out along the edges that you can’t keep wet.
The thinner feather coats of paint avoid the build up of lap marks while painting. To paint the large areas without any laps mark is to roll the dry roller in different directions along the edges. After completing the entire length of the wall, move to the other section. For the second coat apply the paint in opposite direction. This crisscross paint application sharply reduces the lap marks.
So we have seen that how we can get the most out of our paint project by following the above stated guide lines. These guide lines are quite easy and helpful to follow them.
If you are looking for professional painting professionals look no further, check out — Radiance painting services


No comments:
Post a Comment